Hooray — at the risk of waxing poetic, you’re entering a world of enormous joy and possibility!
I ordered my first cargo bike from Canada in 2018 and had about a 6 week wait before it was delivered. In that time I felt totally panicked. Cargo biking was still relatively rare in Boston, and I worried that I was unnecessarily subjecting my 1 year old to great danger.
This is not an uncommon sentiment when you’re new to this world. But, there is a lot you can do to set yourself up for success. In this post I’ll talk about what you can add to your bike to keep yourself safe, comfortable, and to appreciate the full utility of your bike. Keep in mind that the best things you can do to keep yourself safe are to ride predictably and confidently and to obey traffic laws (there is a lot of safety within your control!).
This is the list of safety must-haves and helpful accessories that I’ve come up with after 13,000+ miles of biking with kids and cargo over the past 6 years in a major US city. At the end of the post I’ll include tips for practicing on your bike to help you feel more confident when riding on the street.
Safety Must Haves
This list is different from what I used when I was just bicycling myself. With kids on board I want to be sure I’m doing everything in my power to make sure we’re seen. I didn’t aquire all of these extras on the first day I had my bike. After riding for months I added them piece by peace as I realized what would be helpful.
These are elements that I consider passive safety — they are on your body or bike and besides turning them on/fastening buckles and belts, they are always there and ready. Keep in mind that your own bike handling skills and following the rules of the road are what will keep you the most safe.
- Well-fitted helmets for adults and children. Have you heard the statistic that at least half of all car-seats are installed incorrectly? My instinct says that bike helmets are nearly the same (or worse) based on what I see while riding around. Kids have big heads in proportion to their bodies, but fitting a child’s helmet is the same as it is for adults. One caveat to this is that I’ve found that certain brands just don’t work for certain kids. For kids helmets, its best to go to a shop that carries at least two brands so you can shop around (adult helmets tend to be easier to fit across brand).

- Mirrors — yes, more than one! If you have younger children, I recommend using a handlebar mirror fixed towards the passenger seating. A helmet-mounted mirror should then be used for traffic scanning. A helmet mirror for checking on passengers doesn’t work very well because you have to lift your head very high to get the rear rack in view.

Consider continuing to use the passenger rail/belted seat combo, even if your child is old/mature enough to just hold onto handlebars or a passenger rail.
- Safe Passenger Seating — I know the pain of buying an expensive bike, and then needing to buy a bunch of expensive accessories, but will want to make sure that you have a safe and comfortable place for your passengers to sit.
Most falls on a longtail cargo bike happen at low/no speed. True to their name, these bikes are long and can be a bit unwieldy (especially when you’re trying to handle them under load at no/low speed), and even the most experienced/strong cyclist can accidentally dump the bike (I did it on my longtail three times, all from a stop).
While they have different names depending on the company (Monkey Bars, Clubhouse Bars, Hooptie, Caboose, Handrails, etc.), passenger bars help protect the passengers — particularly from the falls that come from low/no speed. The bars help break the fall, and that’s why I used them, even though my kids were old/mature enough to simply hold on to handlebars like this.
From reading the message boards, I know a lot of folks want to get their kids out of seats and sitting on the back of the longtail. Not only because of expense, but also because of ease. I kept my kids in Yepp Seats until they hit the max weight of 48 lbs (the seats have a max weight in the US of 40lbs, but that has to do with US rack limitations, not the integrity of the seat. In the EU the same seats are rated to 48 lbs). The seats are expensive (~$250), but if you get them used you can usually sell them for what you paid.
I loved the seats for keeping my kids contained and limiting their movement. I also love that there’s a harness which kept them from bonking heads when I needed to do a quick stop. From the three falls we had (again, they were all from a stop) — no one was hurt with the Yepp Seat/Monkey Bar combo.
If you’re children are over 48 lbs, Tern now sells seatbelts or you could get something like the Qibbel Jr.
- Lighting — I have a seperate post on nighttime lighting, but consider adding additional lights higher up on the back of your longtail and on the sides of the bike too. No matter how bright, I don’t consider the just the stock front and rear lights to be sufficient lighting. I’d add at least another front and rear light, particularly lights that have blink settings for daytime riding. I had a handle on the back of the Yepp seat where I mounted a light, but I could also post them on the support bars for my sun shade. If you’re having trouble finding mounting points, you can always use a helmet mounted light, or a helmet with integrated lighting.
- A LOUD bicycle horn. I use the Loud Mini from Loud Bicycle. It sounds just like a car, the battery lasts a long time, and it’s triggered by a button that you can place anywhere. This horn has saved me on a number of occasions. Other cyclists have recommend Air Zound, and some buy car or boat horns and affix a battery to their bike).
- Bike Flags are commonplace on recumbent bikes, but I also think they should be essential on cargo bikes (or, really, all bikes!). I use Purple Sky Flags with 6ft poles. I was able to mount it on the long tail with zip ties, but the T-Cycle mount was quite useful on my kids’ bikes. The height of the flag is key — it should be the highest point of your bike.
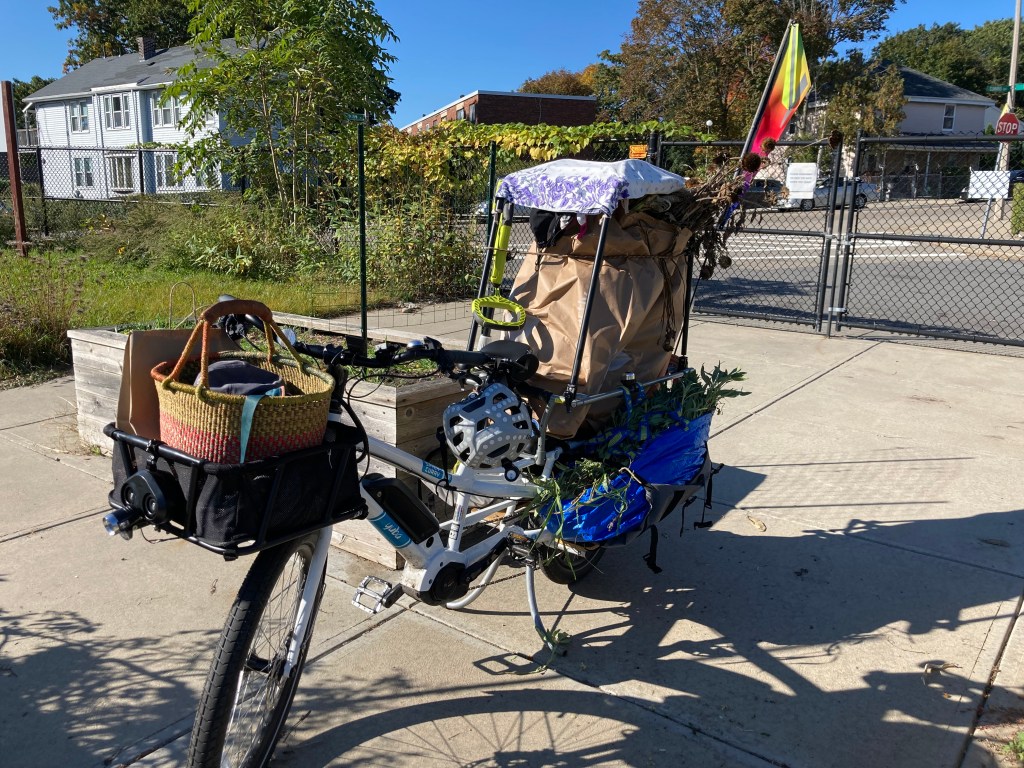
The flag helps increase visibility and actually makes you visible over the tops of cars — check out my bike flag peaking out in this parking lot next to the UPS truck. I’m taller than the neighboring SUV.

- Reflective/Brightly Colored Gear is your friend. In the winter I’m fully decked out from head to toe.
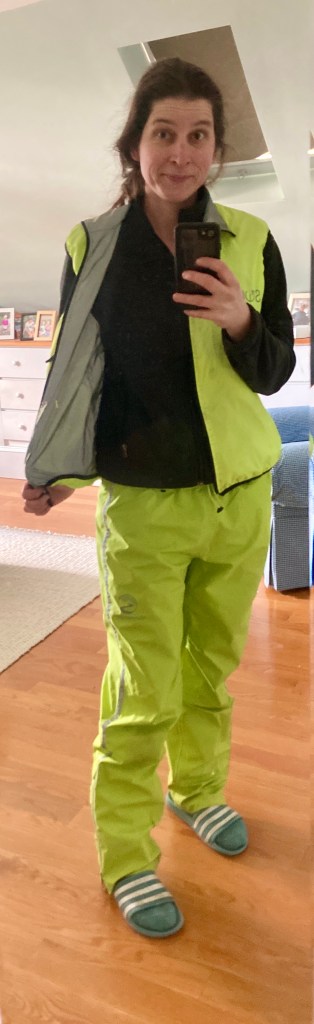
Rain pants are one of my top recommendations to success for winter riding. And if you’re going to wear extra pants, you might as well make them bright!
I got these from Shower’s Pass They cut the wind marvelously and really help make you comfortable in the cold (and/or wet) weather. There are definitely less expensive options, especially if you don’t get something waterproof. Do try to get get a pair with pockets (mine don’t have them and I really miss them for storing my bike’s Kiox display and keys when I’m off the bike.
My vest is reversible and the entire interior is reflective. When I wear it in night mode, coupled with my helmet light, I glow (people have stopped me asking me if I was wearing an electric vest).
You can add reflective stickers and tape to the frame of your bike. I’m definitely a ‘more is better’ type of person when it comes to visibility.
If your kids are on the rear rack of the bike, and not blocked by child seats, you can also have them wear their vests which is great practice for when they’re biking independently.
My younger daughter has this one by Salzmann. I prefer the zip-up style as it’s easier to get on and off when wearing a helmet. My older daughter has a hand me down running vest, and if her helmet is on before putting on the vest, it usually gets caught on her head.
Keeping Your Bike Safe
NEVER USE A CABLE LOCK. This is the most important point and I put it at the top in obnoxious caps because I’m amazed by how many expensive bikes I see “secured” with a cable lock. I’m not an expert bike thief…but even I can easily get through a cable lock with tools I have at home.
Moving on…
One benefit of a cargo bike is that it’s big and heavy. Stealing one is often times less of a crime of opportunity than a normal bike, assuming you lock it securely. By this I mean that if your bike is immobile, someone can’t simply come and pick up your bike and plop it in their truck unless they have two strong people ready to go.
I currently ride a bakfiets, which is harder to steal. If I was still on my longtail, I’d invest in an anti-angle grinder lock like the LiteLokX1 or the Hiplock. Actually, I’d probably get two – because it can be hard to capture the bike frame and what you’re locking it to all in one ulock. This way you can give yourself more length with very secure locks.
Make sure that you’re locking the frame of your bike — not the wheels or any other removable accessories (front basket, passenger bars, etc.). Your frame should be captured every single time you lock up.
Depending on the situation, I currently use between 1-4 locks. I always utilize my cafe lock. If the bike will be out of site, depending on where I am, I’ll add a 9mm plug in ring chain, next level is a folding lock, and if I’m extra concerned I’ll bring my 12mm ring chain and ulock (that normally stays at home for garage lock up).
Bike locking advice often encourages you to lock up both wheels. I used to do this on my trike but it was a pain on a big bike. I no longer lock the front wheel and have not had an issue.
I keep my bike in a locked garage, but it is locked with the aforementioned 12mm chain and an Abus ulock to a ground anchor. Be sure to secure your bike even when you’re at home. Bike sheds and garages can give a false sense of security – especially if you accidentally leave them unlocked (which I’ve been known to do from time to time).
I never leave my Kiox control panel on the bike when it’s parked, and if you also have a removable display, you should be in the haibt of taking it with you. In removing it you not only make sure that it won’t get taken by a passerby with sticky fingers, but if someone does take my bike, it’s going to be hard and completely unenjoyable to ride it without e-assist.
Depending on where I am I may also take off the battery. This was something I did more readily when I used a stroller at my destination…batteries are heavy and it’s not fun to carry the extra weight. It’s rare for me to take off the battery now, but I still do it from time to time.
You can also install tracker(s). I’ve used both Knog tracker/alarm and Airtags. I think using two can be helpful. Thieves know to look for these but maybe they’ve not yet caught on that there could be two. You should also open up the tracker and remove the speaker so the thief isn’t alerted on their smart phone that they’re being tracked.
You can also go the insurance route — see if your bike is covered under your home or renters policy. You can also go through a private vendor like Velosurance.
Practice!
If you’re new to biking with your kid(s), it can feel daunting to manage your new bike under a heavy load. Have you ever hoped on your friend’s bike, or rented a bike, and thought it felt so weird? Now, if traditional bikes require an adjustment period, cargo bikes absolutely require an adjustment period. They typically have longer lengths, are heavier, carry heavier loads, have a different turning radius, may have smaller wheel sizes, etc. In a previous post, I emphasize the 80 mile rule which means you should expect it to take a full 80 miles of riding before your bike feels normal. If you’re not already used to cycling with traffic, this could take longer.
Does this mean you have to wait until you’ve logged hundreds of miles of riding until you can take your children out? Absolutely not — but you’ll want to adjust your routes depending on your comfort level.
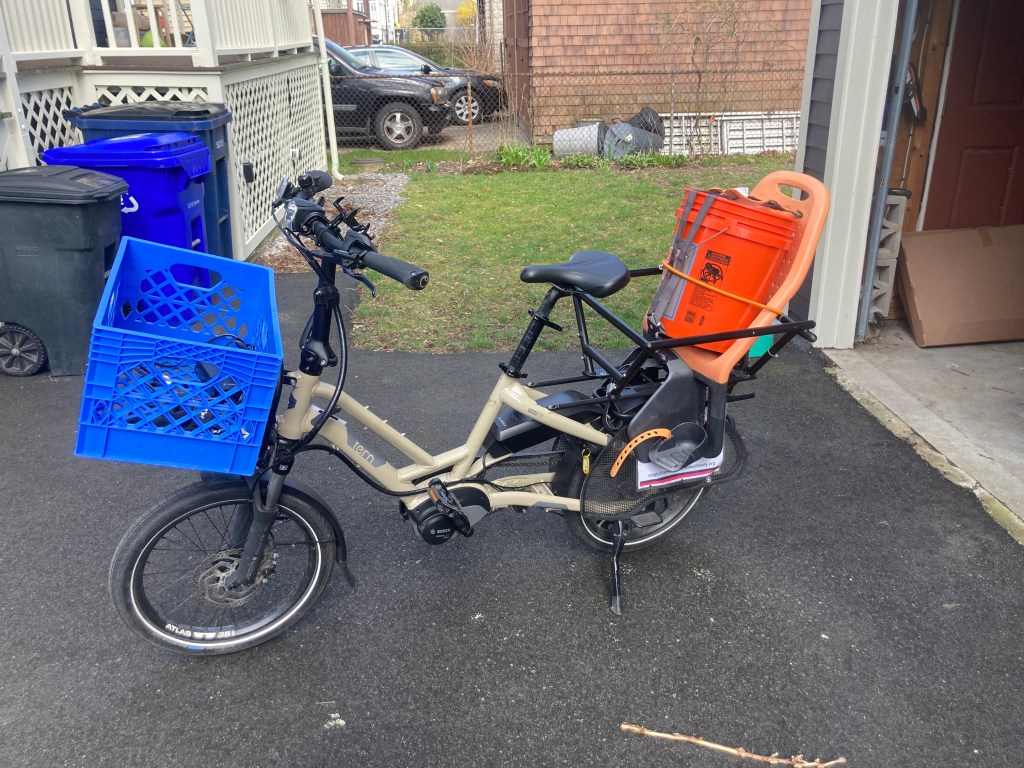
Your first test ride should absolutely be without children on board. I recommend testing first with no weight at all, and then adding on a substitute weight. Five gallon buckets come in handy for this purpose.
Stay on no/low stress routes until you feel comfortable. Remember, if you ever get yourself into a pickle you can always roll up onto the sidewalk or get off. Keep in mind that walking your bike with a kid or two on the back can also be tricky. If you’re really in a jam you may want to have them dismount and walk with you.
It also helps to preview routes before you bring your children. Google maps street view is very helpful in this scenario, and you can also do a test ride when you’re on your own. I have a lot of confidence when cycling in Boston because I know what to expect. I know that cars often ignore the ‘No Right On Red’ sign posted near my child’s school. I know that cars often don’t stop for bikers or pedestrians crossing streets on the bike path. I know that certain traffic lights don’t register bikers, so if there are no cars present I have to push the walk button on the crossing signal. All of these tidbits come from countless rides through my neighborhood. Even doing a ride once can give you a boost in confidence — like most things in life, we’re a lot more at ease when we know what to expect.
And that sums it up! Besides having children learn to use a bidet and ensuring the little people continue to do a “rest” time after they’ve aged out of naps, utilizing a cargo bike in your every day life is my favorite parenting strategy. I hope you have many, many miles of fun ahead of you!


Leave a comment